


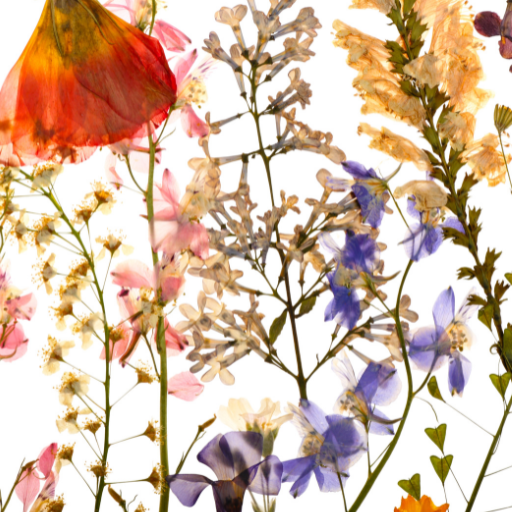
Pressing of flowers has long been a revered and detailed art form used for botanical studies, crafting, as well as conservation of nature’s delicate beauty. Nevertheless, the traditional pressing techniques often take longer to produce the desired results, which may require several weeks. A quicker way is often preferred in our fast-paced world today. To this end, microwave flower pressing offers a creative solution because, within minutes, enthusiasts can dry and press their flowers without compromising on quality. In addition, the article serves as an in-depth guide on how to use the microwave technique in flower preservation; this includes essential materials, the steps involved, and some good practices for better storage of flowers. With this method, however, whether you are an experienced botanist or simply a weekend gardener, this process will be more logical and precise by providing you with speedier ways of enjoying timeless fascination from pressed blossoms.
What is Microwave Flower Drying?
The microwave drying of flowers employs microwave radiation for accelerated dehydration and pressing of flowers as compared to traditional methods. This procedure includes placing the flower between absorbent materials like paper towels or parchment papers and exposing them to microwave energy as short bursts. The moisture in the flowers evaporates quickly, while the absorbent material helps to maintain their shape and color. It is a technique particularly useful for people who want to retain bright colors and intricate patterns in fragile petals, making it a practical approach to storing flowers.
Introduction on Pressing Flowers in a Microwave
Microwave flower press is better than conventional techniques because it reduces time for preservation and dehydration significantly. To be successful at pressing flowers with a microwave, one has to consider these specific issues concerning materials and technical parameters:
- Items Required:
- Fresh Flowers
- Microwave Safe Dish/Container
- Parchment Paper/Paper Towels
- Ceramic Tiles or other type of heavy microwave proof objects
- Step-by-Step Instructions:
-
- Preparation: Choose fresh, non-wilted flowers. Remove excess stems then place the flower between two sheets of paper towels or parchment paper.
- Layering: Place prepared flowers between ceramic tiles or into a microwave-safe container taking care that they remain flat.
- Microwaving: Set your oven at low to medium (about 50-70% power). Heat the plant at a thirty-second interval, making sure that it doesn’t overheat. It usually lasts 1-3 minutes.
- Cooling: After you are done heating, let the plants sit weighted down undisturbed for few more minutes so that they can finish pressing and cooling off fully.
How Does Microwave Flower Drying Work?
Flower drying via microwaves involves fast elimination of moisture from plant tissues through high-intensity microwaves. This happens because water molecules are dipole molecules, meaning that when subjected to an electric field such as microwaves, they tend to align themselves in the same direction as that of the electric field. When this happens, heat is produced within the material causing water molecules to release moist air through evaporation until complete drying is achieved.
The technical parameters, which determine how effective and safe the method will be include:
- Microwave Power Level: The power should be set at about 50-70% (low-medium) so that dehydration can be controlled slowly without overheating leading to burns on plants.
- Timing: Heat for 30 seconds at a time for a total period of 1-3 minutes. This stepwise approach enables monitoring and adjustment when necessary to counteract overdrying or even burning.
- Containment: When pressing flowers in a microwave, use microwave-safe containers or ceramic tiles. These materials are resistant to microwave radiation without developing any safety issues or degrading their quality.
- Absorption Materials: These include parchment papers and paper towels, which absorb extra moisture, keeping flowers from sticking together or distorting them during processing.
Following these technical parameters, the microwave drying process retains the colour, shape, and structure of preserved flowers. Thus, it is an advanced and effective substitute for traditional means of air-drying or pressing.
Benefits of Using a Microwave to Press Flowers
Pressing flowers by use of microwaves has numerous benefits noticeable amongst them being efficiency and accuracy. One of its main advantages is that it takes far less time than other drying methods. While one may have to wait for days or even weeks during air-drying processes or pressing; using microwaves only takes a few minutes before everything dries up completely. This fast process reduces the chances of mold growing as well as eliminates loss associated with faded colors over prolonged periods reflected by conventional procedures, even after sun-drying services in Uganda.
Moreover, adjusting the microwave power level (ideally between 50-70%) and timing (heat in 30-second intervals for a total of 1-3 minutes), one can achieve precise dehydration without worrying that overheating or burning will happen to flowers. The technical setup also includes using microwave-safe containers or ceramic tiles, ensuring safety and preventing material degradation. Additionally, the use of absorbers like paper towels or parchment paper efficiently deals with excess moisture and maintains the flowers’ shape and structural integrity.
In conclusion, rapid, controlled, efficient drying method of flowers in microwaves enhances their preservation and aesthetic quality leading it to be an improved option as compared to traditional pressing techniques.
What You’ll Need to Dry Flowers in the Microwave
To press flowers in the microwave, you’ll need several key items to ensure the process is effective and safe. Firstly, gather fresh flowers of your choice, ensuring they are cleaned and dew-free. You’ll need blotting paper or paper towels to sandwich the flowers and absorb moisture during microwaving. Additionally, ceramic tiles are essential to provide a stable and heat-resistant surface for pressing. Microwave-safe containers or microwave flower presses specifically designed for this purpose can also be used for convenience and better results. Lastly, a small bowl of water placed in the microwave helps prevent the flowers from becoming too dry and brittle. These materials collectively facilitate an efficient and controlled flower pressing experience.
Essential Tools and Materials
You will need several essential items to effectively press flowers in the microwave to ensure optimal results. These include:
- Fresh Flowers: Select blooms that are freshly picked, clean, and free of moisture.
- Blotting Paper or Paper Towels: Used to sandwich the flowers and absorb excess moisture during pressing.
- Ceramic Tiles: Provide a stable, heat-resistant surface that applies even pressure.
- Microwave-Safe Containers or Flower Presses: Specialized presses designed for microwave use can improve convenience and results.
- Small Bowl of Water: Placing this in the microwave helps to prevent the flowers from drying out and becoming brittle.
Choosing the Best Flowers for Microwave Pressing
While choosing flowers to microwave press, consider selecting those with relatively flat and single-layered blooms that are easier to press and bring about excellent results. Among the perfect ones are pansies, violets, daisies and miniature roses. Do not go for flowers with thick stalks or having several layers of petals as they may not be pressed well and keep a lot of water causing poor outcomes.
- Pansy: Pansies are good for microwave pressing because they have thin petals which have bright colors. Their tiny structure allows them to dry quickly and uniformly
- Violet: The violets can be used as a flower where one can obtain sharp images of pressed flora because they are so frail and devoid of layers.
- Daisy: Classic daisies make excellent presses because of their simple shape with a single row of petals only. They dry out nicely keeping their shape and color intact
Preparation Steps: How to Prepare Flowers for Drying
- Harvesting the Flowers: Select fresh and fully open flowers, preferably picked in the morning after the dew has evaporated. Ensure the flowers are free from any damage or blemishes.
- Trimming the Stems: Cut the stems to a manageable length, typically about 1-2 inches, to facilitate better pressing and to fit within the pressing device or microwave-safe container.
- Pre-treating with Silica Gel (Optional): For flowers that are particularly thick or moisture-rich, consider pre-treating them with silica gel to aid in moisture removal. Place the flowers in a container filled with silica gel for 24-48 hours before pressing.
- Positioning the Flowers: Lay the flowers flat on blotting paper or paper towels, ensuring that no petals overlap. Cover them with another layer of blotting paper or paper towels to absorb moisture from both sides.
- Layering for Pressing: Place the prepared flower layers between ceramic tiles or within microwave-safe flower presses. Ensure that the layers are evenly spaced to apply uniform pressure during pressing.
- Using the Microwave: Insert the flower press or ceramic tile setup into the microwave along with a small bowl of water. Heat in short intervals of 30 seconds to 1 minute, checking regularly to prevent overheating. Adjust the intervals based on the thickness of the flowers and the power of the microwave.
- Cooling Period: After microwaving, allow the flowers to cool completely before handling them. This reduces the risk of brittleness and preserves their shape and color.
- Final Inspection: Once cooled, inspect the pressed flowers for any remaining moisture. If necessary, repeat the microwaving process or let the flowers air dry for an additional 24 hours.
Step-by-Step Guide: How to Use a Microwave Flower Dry
- Select the Flowers: Choose fresh, fully bloomed flowers without any visible defects. Remove any unwanted leaves or stems.
- Prepare the Microwave Press: Use a microwave-safe flower press or create one using ceramic tiles and rubber bands. Place parchment paper between the tiles to prevent sticking.
- Arrange the Flowers: Place the flowers in a single layer between the parchment papers, ensuring they do not overlap.
- Add a Small Bowl of Water: To prevent the flowers from burning, place a small, microwave-safe bowl of water inside the microwave.
- Microwave in Intervals: Microwave on high for short intervals, starting with 30 seconds. Check the flowers after each interval to monitor progress and avoid overheating.
- Cooling Period: Allow the flowers to cool completely between each microwaving session to reduce brittleness and maintain their natural shape.
- Final Drying: After achieving desired dryness, let the flowers air dry for an additional 24 hours to ensure all moisture is removed.
Microwave Flower Dry: Setting Up
To set up your drying process for flowers using a microwave, start by selecting fresh ones that are full browning or shriveling and free from on any spots. Employ a microwave safe flower press or create one with common household items like parchment paper and ceramic tiles. Have the flowers between pieces of baking parchment to avoid direct contact or sticking to a press. Make sure the flowers lie in one layer without overlapping. Plus, put into the microwave a small bowl containing water that is microwavable to act as a cushion on humidity for flowers thereby reducing chances of burning them. Start the microwave heating in brief spells usually around thirty seconds then see how much progress there is with the flowers after each session. Flowers must be cooled completely in between all bursts so as to maintain their shape while making them less brittle. The final stage involves leaving them air dry for additional period of twenty four hours in order to get rid of any moisture which may be remaining inside them; this method will help you retain color and shape longer.
Microwave Settings and Timing Tips
When using a microwave oven to dry your flowers, it should be set at low or medium power level. It is typically 30% – 50% of maximum power setting on most microwaves that prevents overheating and retains original color of flowers. At first try 30 seconds and then check your progress after every session until done entirely. However some types, such as harder flowers may require longer exposures reaching even one minute or more, but always remember about being careful when drying plants like these ones n a microwave oven! Another suitable alternative would be utilizing “defrost” function, if available as it runs at lower power levels thus gentle on floral colors too Rotate the microwave-safe press or the ceramic tiles between intervals to ensure even drying and avoid hotspots. Always include a small bowl of water inside the micro-wave throughout its use for drying flowers to serve as a humidity buffer, which would help flowers keep their shape and color. After reaching desired dryness, an additional air drying period of 24 hours is recommended to remove any remaining moisture effectively.
Step-by-Step Process: How to Dry Flowers in a Microwave
- Gather Materials: You will need fresh flowers, a microwave-safe container or flower press, ceramic tiles, coffee filters or blotting paper, and a small water bowl.
- Prepare the Flowers: Cut off excess leaves from the stems of flowers and trim them down to about one inch. Arrange them between two sheets of blotting paper or coffee filters. This helps absorb moisture from the flowers thereby protecting them during the drying process.
- Assemble the Press: Put your prepared coffee filters/blotting papers with flowers onto microwavable container/2 ceramic tiles. These should be able to resist heat produced by that microwave without being destroyed.
- Add Humidity Buffer: Place a small bowl of water inside the microwave as you start it up again for drying your flower. This acts like a cushion on humidity, especially when drier-than-usual periods are experienced, as it preserves both color and shape.
- Set Microwave Power Level: Adjust your microwave oven’s power to be either low or medium, which normally ranges between thirty percent and fifty percent of its maximum possible output power. Alternatively whenever available use “defrost” option because it works at low energy levels;
- Microwaving in Phases: Commence microwaving the container or press for short thirty second intervals. Assess the development of these flowers after every interval and turn the press over or rotate it to ensure even drying. For tougher flowers, this process might extend to 1-2 minutes.
- Check and then Cool: Allow the flowers to cool down completely after each microwaving session to reduce brittleness and preserve shapes. Any attempt to avoid over-drying should involve frequent monitoring of how dry they are.
- Final air Drying: Once you think your flowers have reached the desired dryness, remove them from the microwave and leave them air drying for another 24 hours. The aim is to remove all remaining moisture.
By following these detailed steps, you will be able to dry your flowers effectively in a microwave while maintaining their natural color and beauty. This method utilizes a combination of best practices as per various authoritative sources, ensuring good-quality outcomes.
How Long Does it Take to Press Flowers in the Microwave?
Timing is a very important factor in pressing flowers in the microwave, and it may vary depending on the flower type, thickness, and the power of the microwave. Typically, little or delicate flowers might take one to two minutes, while fatter or bigger flowers may need about two to five minutes. For proper drying without burning, it’s important to check every 30 seconds and rotate them each time they are microwaved. When, after each interval, the flowers have cooled down completely, their brittleness is avoided, and they maintain their shape.
Understanding Timing: Flowers in the Microwave
Flowers that are pressed using a microwave save some amount of time when compared with traditional methods such as air drying. As per reliable sources today, this procedure involves microwaving these blossoms for around three minutes up to one minute tops (depending on their size and thickness). You can start out with smaller increments like half a minute up to one minute then observe how far you have come before pulling back from overheating of any kind. Turning consistently between intervals while cooling avoids brittleness during drying. These precautions will help get great results while keeping the natural beauty of your flowers intact.
Factors Affecting Drying Time
Several things determine how long your microwave will take to dry the flowers; these include the type of flower, thickness, and power setting on your microwave oven unit. Flowers such as daisies or violets dry faster than those with thicker petals like roses or sunflowers because they contain less water, thus less moisture content, making them more susceptible to air drying quicker. The higher wattage of the MW accelerates the process but also increases the chances of overcooking; hence, care should be taken when adjusting power levels where necessary. Some popular configurations range from 600 to 1200 W, although lower-end settings reduce the chances that burning may occur.
Another aspect that plays an important role is the moisture content of our leaves. Higher water content in flowers requires a longer interval in the microwave to ensure complete drying. However, as mentioned before, you should start with short bursts and progressively increase your timing based on how far you have gone.
Lastly, you may consider a microwave-safe flower press or paper towel that will aid in even absorption of moisture, thus reducing the time taken to dry. These materials are useful as they help spread heat from microwaves equally and remove excess moisture, thereby ensuring that the structure of these flowers remains intact during the drying process.
Knowing When Your Flowers are Fully Dried
You should look for specific visual and tactile indicators to determine when your flowers are fully dried. The colors of fully dried ones will be slightly darker and more muted than their fresh versions. This is because the petals and stems become papery and crinkly to the touch, indicating that all the moisture has been removed. In technical terms, such blossoms need to have less than 10% moisture content, which means complete drying has occurred.
According to respected sources like gardening guides or microwave drying handbooks, checking by gently touching the petals and stems at specified intervals may be used to judge if flowers have dried enough. The petals cease feeling cool or wet but instead start developing crispness, showing that they are finally done.
Moreover, some of these operational parameters can also help:
- Microwave Power: Use 600-1200 W power settings depending on flower type and thickness.
- Intervals and Duration: Begin with a 30-second short duration, then slowly increase by 15 seconds until they are dry.
- Moisture Absorption Materials: You should use either paper towel or microwave safe flower presses that scatter heat evenly throughout, and also soak up excess water, this will make sure the drying is uniform.
This will ensure that the flowers’ structural integrity and aesthetic qualities are maintained during the drying process. By agreeing with these signs and conditions one can tell when his flowers are dry enough.
Tips and Tricks for Perfectly Pressed Flowers
For perfect pressed flowers, start by picking fresh that have no blemishes and cut them out in the morning after is gone for an optimum outcome. Use acid-free blotting paper or, alternatively, parchment paper so as to prevent any discoloration-causing agents during the pressing process. Place the flowers between blotting papers and sandwich this arrangement between heavy books or put it inside a flower press. Constant pressure should be applied and then keep this set up in a dry place away from direct rays of the sun. It is, however, important to let these flowers press for at least two to four weeks, checking on their progress periodically, but do not be tempted to disturb them too much because you might spoil their delicate petals. For improved outcomes, one has to be careful when handling dried plants after they have completed drying and tweezers can assist in putting them into suitable display styles.
Microwave Flower Presses: Best Practices
When using a microwave flower press, there are some best practices that must be followed for good results. Initially, select thin flowers or reduce excess moisture from thicker ones before pressing so that uniform drying can take place faster.. Get your microwave plates provided with which you should set your flowers without overlapping since they will not dry uniformly.
In order to avoid burning or overheating of flowers, set the microwave at low or medium power levels. Start with 30-second increments, checking how far each interval has brought you towards your goal of attaining perfectly dried plants. The standard duration for pressing is usually 1-2 minutes depending on the water content as well as the thickness of petal materials, which tend to differ among different species of flowering plants involved here; remember that higher wattage ovens would call for shorter bursts; hence, please adjust accordingly.
Allow intervals between sessions for cooling off before proceeding with the next stage due to possible heating up already done previously and moisture build-up within cells. Use only microwave-safe materials that will not disintegrate upon repeated heating. Examples include microwave-safe blotting paper or parchment materials, which absorb moisture and give a consistent press.
Fine-tuning the process calls for reference to technical parameters offered by authoritative websites on flower pressing, as well as those suggested by botanical experts. Following these guidelines meticulously, you can achieve beautifully pressed flowers with minimal discoloration and maintained structural integrity.
Advanced Techniques in Pressed Flower Art
If you want better results from your pressed flower art, consider using techniques that will enhance its beauty and durability. One such method is the layered technique, where various floral species with different colors are laid one on top of another, carefully creating an impression of depth as well as texture. Another way is integrating dried flowers into other natural objects like leaves or twigs so that there can be greater dynamism in designs created.
Embed the pressed flowers in resin to make them look more professional. This technique not only maintains the plants’ original vivacity but also gives them a glossy finish that protects against weathering effects. Additionally, digital scanning of pressed flowers can be utilized to create digital art prints or fabric patterns, allowing for endless creative applications.
Another possibility could be exploring diverse types, namely, watercolor backgrounds plus calligraphy works, for instance, which normally produce stunning outcomes. Such advanced skills, if well applied through drafting with precision and innovation, can go much further towards enhancing visual impact and preserving texture in this form of fine art made out of dried plant parts.
Common Slip-Ups and How to Avoid Them
When it comes to pressing flowers, there are several common mistakes that can affect the quality and durability of your final art pieces. One frequent mistake is improper preparation of flowers; this means that the flowers should be dry and free from moisture since any water left can lead to development of molds. According to experts in botany, picking up flowers during late mornings when dew has dried up helps in reducing their moisture content.
Another mistake involves using incorrect pressing materials. To get the best results, use blotting paper or parchment paper between the flower and the pressing surface to remove excess moisture. Do not use paper towels since they may absorb moisture into the flower, interfering with its attractiveness in terms of color. Moreover, one authoritative source advises that uniform drying and flattening require consistent pressure, typically around 30psi.
Improper timing of the pressing process may also lead to imperfections. Depending on their size and thickness, flowers should be pressed for about two to four weeks in general. Depending on their size and thickness, flowers should be pressed for about two to four weeks. Depending on their size and thickness, flowers should be pressed for about two to four weeks in general. Depending on their size and thickness, the bulbs could still be wet when removed prematurely, which makes them remain under dried, whereas extended pressing makes them hard and brittle. Hence, it’s good to keep monitoring them occasionally until the project is done.
Creative Uses for Pressed Flowers
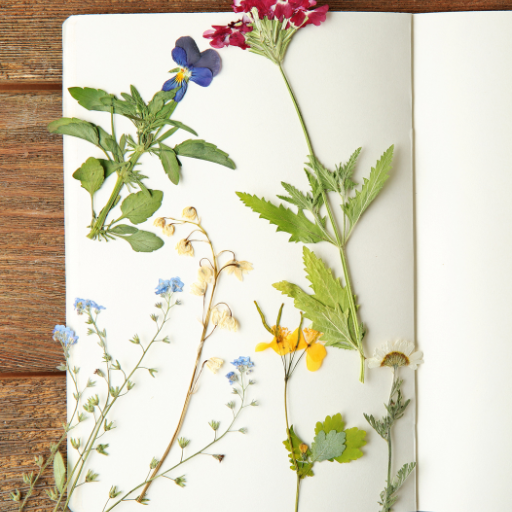
The use of pressed flowers in this is numerous, as they could be utilized by various artists to add beauty for both decorative and artistic purposes. These can also be installed with personal touches when creating cards or other forms of stationary. Some home decor items that can be ornamented using these include candles, coasters, and picture frames, among others, giving them a natural touch. The significance of pressed flowers in botanical illustration and herbarium specimens is also profound because they are required for teaching and recording information in plant science. Besides, you may choose to put it inside resin craft such as making jewelry or decorative key chains where their original beauty will remain unchanged.
DIY Projects Involving Pressed Flowers
One such project involving pressed flowers is making bookmarks with the flower pressings. Buy a fine piece of cardstock or watercolour paper which you should then size the bookmark desired before arranging the flowers on it in any way possible. The arrangement should then be stuck onto the paper using clear drying adhesive, e.g., PVA glue, which covers all parts, including the stem part, until it completely adheres to all areas. Laminate your flower pressings once dry so that they are long-lasting and do not easily break since 250 degrees Fahrenheit prevents damage to plants caused by lamination temperatures. Another option would be to create phone cases from dried flowers collected over time. Get a transparent phone case and put dry petals carefully inside. Use non-yellowing resin over the topmost layer through UV lamp curing at 36 watts for about two minutes after setting up the flowers, but first, you must pour the resin into the case slowly so as to avoid bubbles forming under them.
Lastly, one can make botanical candles by embedding pressed blooms into a layer of clear wax followed by pouring some more wax on top that encases them without letting wick touch the petals. Melt candle wax until it reaches approximately 140° Fahrenheit, pour a thin layer into the mold, tweezers used for positioning pressed blooms then add more hot pot around them as long as they do not get into contact with a wick directly. Hence these projects preserve the natural beauty of flowers while creating unique personalized items.
Including Pressed Flowers in Art and Craft
Incorporating dried flowers in art and craft can be an excellent way of adding sophistication to different creations by giving them both minute details and a bit of nature. A more elegant approach isInlaying resin with pressing flowers for making jewellery or decoration pieces.In order to achieve the perfect results mix your resin with hardener at an equal ratio; also ensure that there are no bubbles if this is done before placing your pressed flower.
Another method is called decoupage where flowers from a flower press are stuck onto things like furniture, canvases or ceramics. Use Mod Podge that dries clear (or any other similar type of decoupage medium) by applying it thinly on the surface upon which you want pressings attached. Seal your design using multiple coats of the same medium after you have arranged everything properly ensuring each coat has completely dried. For best outcomes, apply light sanding between every coating and give it a professional finish.
Pressed flowers can also be used for paper making purposes. Make pulp by putting recycled paper into water in ratios of 2:3 followed by mixing in some pressed flower petals from your own collection. Put this mixture onto a screen so as to form sheets after spreading it evenly throughout pulping process. Complete drying results in custom made stationary impregnated with botanical matter at hand
Further, dried flowers may be employed in producing pictures of plants. Lay the dried flowers on premium-quality papers that are free from acid and paste them using a clear adhesive or any other method of framing that will protect the flowers from light and moisture. To improve preservation, you may use a UV-protective spray, which protects against fading.
This is a comprehensive guide for artists and crafters who wish to use pressed flowers in their projects while ensuring long-lastingness and beauty. What these methods do is reveal the natural attractiveness of flowers preserved in a way that brings out their delicate construction and bright color.
Frames For Remembering With Dried Flowers
Choose an acid-free mat board that will not turn yellow over time, which will help make memory frames with pressed flowers. Get a shadow box frame, as this style allows enough space for the depth of pressed flowers without exposing them to air, which can result in dusting or destroying them. Ensure that the glass has ultraviolet radiation protection against sunlight fade-out.
To decorate the mat board, carefully place some press-dried plants, considering how colors interrelate, and what kinds look like when they are gathered together. Use corners or archival adhesive to fix these floral components by making sure there is minimum contact possible since chemicals usually cause decay of such botanical materials.
For example, include photos, hand-written notes, or souvenirs that match well with each other. If stacking things together, then employ spacers between glass and matting so as not to put pressure on crushed petals. Join all sections tightly holding everything together including back piece properly.CAUTIONS: This requires much patience because it involves many steps, but it depends on individual preferences because sometimes others might have different choices compared to what one may prefer.
Accordingly, this article provides detailed instructions for creating beautiful picture displays involving pressed plants while keeping them safe for generations ahead.
Frequently Asked Questions (FAQs)
Q: What materials do I need to press flowers in the microwave?
A: To press flowers in the microwave, you’ll need a few essential materials: fresh flowers, two ceramic tiles or plates to act as flower presses, absorbent paper like coffee filters or paper towels, and a microwave safe rubber band or string to hold everything together.
Q: How do I prepare the flowers for microwave pressing?
A: Start by collecting flowers that you wish to press. Ensure they are fresh, with no signs of wilting. Trim off any excess leaves or stems, and arrange the flowers flat between absorbent paper, such as paper towels or coffee filters.
Q: How long do I microwave the flowers for?
A: Typically, you want to microwave the flowers for short intervals. Start by microwaving for a minute at half power, and then check if the flowers are completely dry. If not, continue in increments of 30 seconds until they are fully pressed and dry. This easy way ensures they don’t burn or over-dry.
Q: Can I use any type of microwave safe container?
A: Yes, it’s crucial to use microwave safe containers to avoid any mishaps. Ceramic tiles or plates work best because they provide even pressure and heat distribution, ensuring your flowers dry properly.
Q: What flowers work best for microwave pressing?
A: Flowers with thin petals such as pansies, daisies, and lavender work best for microwave pressing. Thicker flowers may require longer drying times and sometimes do not flatten as evenly.
Q: How do I ensure my pressed flowers maintain their color?
A: To preserve your flower’s vibrant colors, press them as soon as possible after collecting. Additionally, microwaving at half power helps prevent scorching and discoloration. Over-drying can make flowers become too brittle and lose their color.
Q: What can I do with microwave pressed flowers?
A: Once you learn how to press flowers using a microwave, you can use them in various DIY projects. They are perfect for creating artwork, decorate cards, making bookmarks, or framing them in a floating frame. The possibilities are endless and they make great personalized gifts!
Q: Can children participate in microwave flower pressing?
A: Yes, this is a fun and safe activity for children with supervision. It’s a great way for kids to collect flowers and learn how to press them. Ensure they have proper guidance when using the microwave.
Q: How can I store my pressed flowers?
A: Store your pressed flowers in an airtight container to keep them safe from moisture and light. You can also place them between sheets of wax paper and store them in a dry, cool place. This will help keep them looking beautiful for a longer time.
Q: Where can I find more tips and related posts on flower pressing?
A: For more tips and related posts on flower pressing and preserving flowers, visit online crafting blogs, check out DIY YouTube channels, or delve into books dedicated to flower art. There’s a wealth of information available to explore more techniques and creative ideas.