


For many woodworking projects, thoroughly drying microwave wood is essential to avoid cracking, warping, and other defects that can affect the quality and appearance of the finished piece. Traditional methods of drying wood are slow and space-consuming, but a microwave can provide a faster and more compact alternative. This article aims to be your ultimate guide to drying wood with a microwave oven; it will give you all the necessary details for safely and completing this process at home. From basic scientific knowledge, which explains how microwaves work, to specific step-by-step instructions on usage techniques and safety precautions one should take when handling such equipment – everything is covered here! Therefore, whether you are an experienced craftsman or someone who loves doing things themselves – let us reveal some secrets about microwave woodworking.
What Is Microwave Drying and How Does It Work?

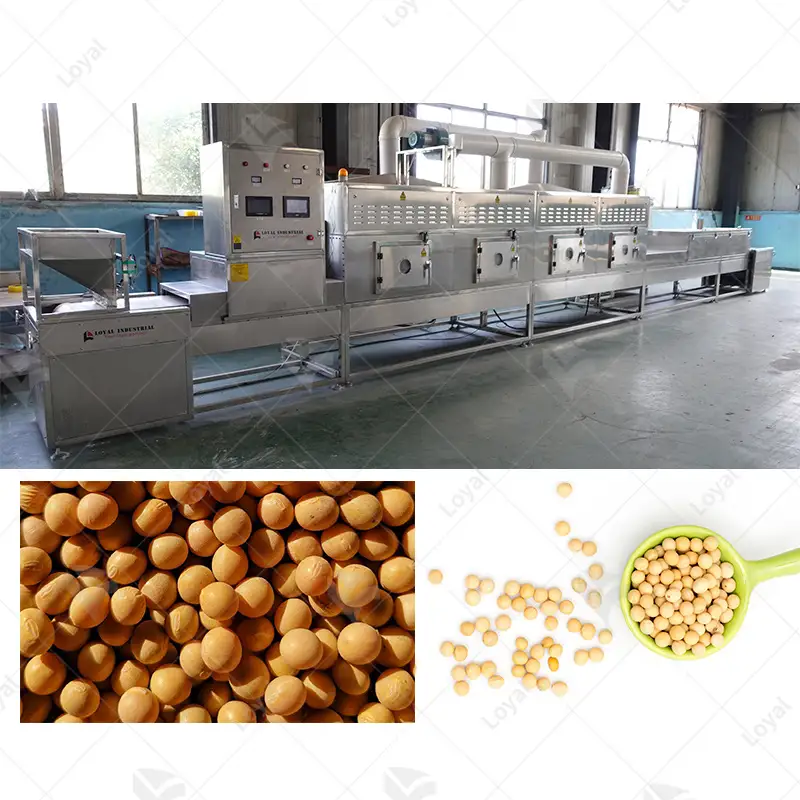
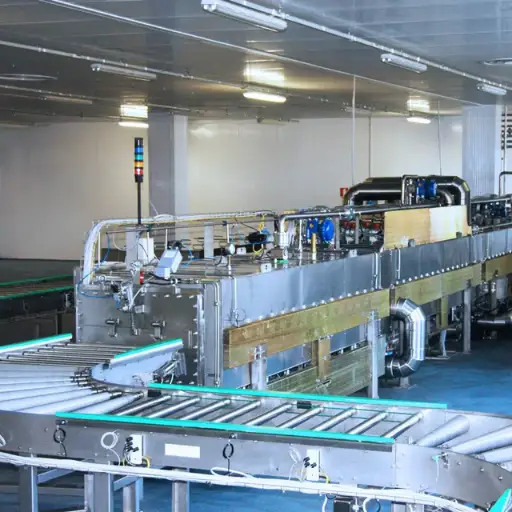
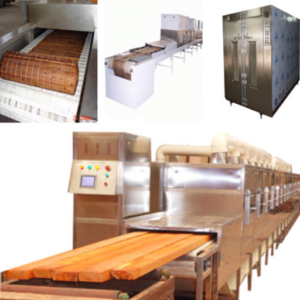
Image source: https://industrialmicrowave.com/
Microwave drying is a process of removing water from wood using electromagnetic waves produced by a microwave oven. If wood is put into the microwave, its moisture absorbs the microwaves, which causes its molecules to vibrate rapidly, thus heating it. This heat evaporates the liquid afterward and is let out through oven ventilation. Compared with traditional air-drying or kiln-drying methods, this technique is much faster since it targets uniformly across all points regarding moisture content and can reduce incidences like cracking and warping. Woodworkers are attracted to microwave drying because they have control over efficiency; this helps them save time without compromising the quality of their materials.
How Does a Microwave Dry Wood?
By employing electromagnetic waves to heat the water molecules inside wood, microwave drying makes them oscillate. These waves infiltrate through the timber, making its moisture evaporate when they cause vibrations in contact with it. The microwaves are absorbed into the water, which is expelled by turning more vigorously into steam as it absorbs this energy from them. Hence, this technique eliminates dampness throughout, preventing any defects, such as splitting or bending, caused by irregular drying. Moreover, microwave drying accelerates the process and enables better control over final moisture content, thus becoming the most effective method for woodworkers who want to achieve high productivity and quality standards.
What Is the Science Behind Microwave Drying?
Microwave drying is based on the relationship between electromagnetic waves and water molecules. If microwave radiation comes into contact with wood, its internal moisture absorbs these vibrations, which makes them oscillate more rapidly. In turn, such molecular motion produces inner warmth that raises water temperature quickly, leading to its evaporation. The difference between conventional drying methods, which use outside sources of heat, and microwaving is that heating occurs from within a piece of lumber, thus ensuring uniformity throughout the entire process (also inside parts). This method also saves time because it dries much faster than other methods, which may take longer, so crack and warp are avoided mostly. Additionally, one can achieve desired results with microwaves by controlling moisture levels accurately for evenness during drying.
How Does Microwave Heat Affect Wood Structure?
The wood structure is affected by heating in a microwave. This happens due to rapid internal heating, which may cause transformations in the wood microstructure. Fiber stress can rarely bring about small cracks when intense heat produced by water molecules vibrating comes into contact with them. Nevertheless, controlled employment of microwaves can help to reduce these risks and guarantee the stability of structures. Besides preventing warping or other drying problems, even drying lowers their occurrence throughout the material. All-round efficiency in removing moisture content and preserving structural properties makes microwave drying good for preparing wood that will be used in different applications according to the needs expressed by this response.
Why Choose Microwave Drying over Traditional Methods?
The reason why microwave drying is better than traditional methods is because it is efficient and accurate. This method reduces drying times by a great deal by heating the wood inside, which removes moisture uniformly and gives us more control over the final moisture content. Another advantage of even heating that this process brings about is that it prevents typical drying problems like cracking or warping. Besides saving energy, unlike heating surrounding air, this way only heats wet parts. More applications can benefit from microwave drying than any other type since we can ensure wood meets specific quality standards through precise control of drying conditions.
Benefits of Using a Microwave to Dry Wood
Microwave drying wood offers various benefits over conventional drying methods. The most important advantage is the much shorter time it takes to dry things up; microwaves heat things from within, which quickens evaporation. Equally important, however, is that through this technique, objects are dried uniformly, thereby preventing common defects like cracking, splitting, or warping. Another thing worth noting about microwave-driedness is its energy efficiency. Instead of heating the surrounding atmosphere as other systems do, microwaves address themselves only to moisture, thus making them more power-saving overall. What could also be said about this method is that controlling moisture content with great accuracy and the quality and consistency of timber make it the preferred choice among industries dealing with high-grade materials.
Comparing Microwave Drying to Kiln and Air Drying
Microwave, kiln, and air drying are the three main methods used in the wood industry to remove moisture. Each method has its advantages and disadvantages.
Microwave Drying:
- Speed: This is the quickest of the three methods, often taking only a few hours to dry completely.
- Energy Efficiency: It targets moisture directly, which makes it more energy efficient.
- Quality Control: It provides even drying, thus reducing defects like cracking, splitting, and warping.
- Cost: Generally, higher initial setup costs are due to the need for specialized equipment.
Kiln Drying:
- Speed: Takes intermediate time for drying, usually lasting from days to weeks.
- Energy Consumption: It uses significant energy to maintain high temperatures and air circulation but less compared to microwave drying in operational costs.
- Consistency: Provides controlled conditions resulting in uniformity of high-quality woods with fewer defects than the air-drying method.
- Versatility: Suitable for a wide range of wood types and sizes.
Air Drying:
- Speed: The slowest method, which takes months, sometimes
- Energy Efficiency: A minimum amount of energy is consumed since it mainly depends on natural airflow and ambient temperatures.
- Costs involved: Low initial and operational expenses require ample storage space and extended time management.
- Quality Control: There is a higher risk of defects because environmental conditions cannot be easily controlled during this process. Also, the drying rate is low.
In summary, microwave drying is highly efficient and effective for rapid, high-quality drying but comes at a higher cost. Kiln drying offers a good balance between speed, quality, and price. At the same time, air drying, slower than any other method, is the most energetic and less expensive method, although there may be quality issues.
Can Microwave Drying Prevent Cracks and Warps?
Microwave drying can help reduce cracks and warps in wood. This technique enables quick, even drying, thereby lowering the chance of internal stresses that cause such faults. It also promotes consistent drying through precise temperature and moisture content regulation, which sustains the wood’s strength. Initially expensive to set up, microwave drying may be, but the reduced defects make it more appealing, particularly when dealing with valuable timber products.
How to Microwave Dry Wood Step by Step
- Select the Wood:
- Go for freshly cut or partially dried timber. Just ensure that it is small enough to fit in the microwave.
- Prepare the Microwave:
- Prepare a microwave with adjustable time and power settings. Place a plate or microwave-safe dish beneath to catch any sap or moisture that may ooze during the process.
- Initial Drying:
- Put the wood in the microwave. Then, turn it on at a low power setting (about 20-30 percent) for a short duration (1-2 minutes). This will help start drying gently to avoid overheating.
- Check the Wood:
- Take out every piece after an initial dry period and look for signs of overheating or burning. Let cool for one minute to release residual heat.
- Repeat the Process:
- Keep microwaving wood at low power in small portions (1-2 minutes), checking and cooling between each cycle. Rotate pieces occasionally to make sure they all dry evenly.
- Monitor Moisture Content:
- Use a moisture meter to check the wood’s moisture content periodically. Target a moisture level suitable for your intended use (usually around 6-8% for most woodworking projects).
- Final Cooling:
- Let wood cool down naturally until it reaches room temperature after attaining the desired moisture level; this is necessary not to compromise its structural integrity, which causes cracking.
By following these steps, you can effectively dry wood using a microwave while minimizing incidences of cracks and warping.
Preparing Your Wood for Microwave Drying
Although it may be adequate to dry wood in a microwave, safety is imperative first.
- Microwave Safety: Be sure your microwave is working correctly and suitable for the task you are about to undertake. Never leave the microwave unattended during wood drying because this process generates heat that can quickly firewood.
- Avoid Metal: Use only safe items in microwaves and do not include metals at all. Even small amounts of metal can cause sparks or fires inside microwaves.
- Ventilation: Make sure there’s enough airflow around your workplace. Vapors and fumes may be released when drying, especially when sap or adhesive residue is present within timber being dried in a microwave oven.
- Type of Wood: Different woods have different levels of moisture content and density, which affect how fast they dry out and the risk involved; hence, one must take note of such variations. For instance, oily or resinous woods might need more care than others while being dried using this method.
- Appropriate Gloves: Wear gloves resistant to heat when handling wood immediately after taking it out of microwaves to prevent burns.
These safety measures will ensure safer and more efficient wooden drying through microwaving.
Using a Microwave Oven: Settings and Tips
To get the best results without harming the wood, microwave drying wood requires specific settings and careful observation.
- Power Level: The advisable power level is medium, which is usually about 50-60%. This allows for uniform heating and also prevents wood from scorching or cracking.
- Time Intervals: Start with small time frames ranging between 1 and 2 minutes, then check the condition of the wood after each cycle. Depending on its thickness and moisture content, dry it longer.
- Rotation: During drying, rotate it many times so that moisture is dissipated evenly throughout and areas that could become too hot are avoided.
- Moisture Monitoring: Always ensure that you have a moisture meter to keep track of the amount in your piece of lumber. Instead of trying drying all at once, aim to reduce this gradually over several cycles.
- Rest Periods: Give cooling down intervals between cycles, which enable heat distribution to be balanced uniformly, thus minimizing internal stresses.
With these settings and tips, one can comfortably dry firewood using a microwave until they achieve desired humidity levels without risk.
How Long Should You Microwave Dry Your Wood?
The time it takes to dry wood in a microwave is very variable. It depends on what kind of lumber is being dried, how big it is, and how much moisture it contains.
- Small Pieces of Wood: Usually, for small pieces of wood, it’s enough to have one session of 1-2 minutes on medium power. After this, check for the desired dryness by evaluating the moisture content and condition changes in the lumber every time you do so within 6-12 total minutes.
- Larger Pieces of Wood: More time will be needed with bigger sizes. They should be microwaved for 2-3 minutes at a time (on medium), repeating until gradual drying becomes evident when checked against a moisture meter. This can take up to about fifteen cycles, with rest periods between them lasting twenty-five minutes overall.
-
Even Drying: To avoid cracking while making sure all parts get heated equally, just rotate around while letting it cool down, then warming back up again evenly distribute heat throughout its surface during every other pause cycle so that each side spends some time close to where others were before switching sides or directions altogether.
Remember, patience pays well in success while trying this out because it not only enhances but also protects things from damage during the microwave dry process, hence producing the best results ever.
Is Microwave Drying Safe for All Types of Wood?
While microwave drying may quickly and efficiently remove water content from wood, it is not safe for all types of timber. For instance, some woods, like pine, with high resin levels can easily catch fire or damage due to uneven heating. Similarly, if a tree has many internal defects or contains too much moisture content at the beginning, it might crack or warp during drying under this method. Hence, one should be cautious by monitoring the material closely using correct microwave settings coupled with incremental heating steps to reduce these risks. For safety purposes, always follow relevant guidelines related to specific woods when carrying out drying processes.
Can You Microwave Dry Green Wood?
Although it requires care in its implementation, greenwood can be dried through microwaving. In order not to crack, warp, or burn wood that has a high initial moisture content, also known as greenwood, during such a procedure, there must be close control over how drying takes place within it, where rotation needs to be done frequently so that evenness is achieved while getting rid of this moisture. Resting after short intervals at low-medium power setting is necessary since this allows the gradual escape of steam produced, thereby preventing any adverse effects on materials being worked upon; besides, regularly checking with a moisture meter, among other instruments, will help us know whether still wet or already dry, thus stay warned throughout the whole exercise about what is happening.
Risks and Precautions of Using a Microwave Oven
Many hazards are involved in using a microwave oven to dry wood, so certain precautions must be taken. Among the most important is uneven heating, where some parts of the wood may become too hot while others remain damp. Such an occurrence may cause cracking, warping, or even ignition of the material. The second danger associated with this method is that it creates internal stresses within the timber, thus making it prone to splitting and breaking, especially for species with high resin or significant initial moisture content.
To lower the risk of injury, one should use low-to-medium power levels during short bursts of controlled heating followed by rest periods to not overwork the dried material. Alternating positions from time to time throughout these intervals can also help ensure evenness in the drying. Another precaution that can be taken is using drying-specific microwaves rather than ordinary household ones since they allow for better temperature control while heating materials for such processes. It would also be wise enough if one keeps track of progress made by wood through moisture meters until they reach the desired points before discontinuing drying techniques altogether. Always follow safety instructions and read up on specific guidelines concerning any particular type of lumber you plan on drying to minimize risks associated with this practice.
What Types of Wood Are Best Suited for Microwave Drying?
Smaller parts or thin boards are usually the best woods for microwave drying because they allow moisture to be removed more evenly. In this regard, oak, maple, and walnut are good examples of hardwoods that can be dried using microwave ovens due to their low resin content and stable structure. On the other hand, softwoods such as pine and fir can also be dried through this method, although it requires extra care because they have more resins that may lead to overheating and ignite easily. Besides, those with low initial moisture content are preferred since, during the drying process, such materials are less likely to warp or develop internal stresses. Nonetheless, you should ensure that no metallic impurities or finishes that might react adversely with microwaves are present in any wood selected.
Practical Applications of Microwave Drying
Microwave drying is widely applicable across different industries and crafts. For instance, cabinetmakers find it convenient when they need instant access to workable timber, saving time compared to waiting for natural air dryness or kiln methods. Artists involved in sculpture-making can also benefit from this technique by stabilizing wood quickly, allowing them to undertake spontaneous creations within shorter periods, too. Moreover, scientists engaged in various experiments where accurate measurements of moisture contents must be considered find microwave drying very useful for their studies’ success rates. Eventually, microwave drying saves labor hours while handling different types of wood, thus becoming an essential device in many practical situations.
How Do Woodturners Utilize Microwave Drying?
Woodturners use microwave drying to prevent green wood from cracking and warping while it is being turned, which involves quickly reducing the moisture content. They get a balanced drying by giving the wood a rest between heating periods. Such a method keeps the stability of timber intact and hence can be used for instant crafting. This approach is most helpful to those who work with small or medium-sized items because they don’t have to wait for long hours, as happens during air drying or kiln treatment. Another thing about fast moisture removal is that it enables continuous workflow so that raw pieces of wood are efficiently transformed into finished products by artists specializing in turning them.
Drying Wood for Bowl Blanks
Drying wood for bowl blanks must be done accurately to avoid cracking and warping caused by moisture content and to ensure it becomes stable and suitable for turning.
- Getting Started: First, rough-turn your blank into an equal thickness throughout to assist uniformity in drying.
- Microwave Drying: Put the blank inside a microwave at a low heat setting for short durations, like 1-2 minutes, then let it cool down before repeating the cycle again until you achieve the required moisture level.
- Air Drying: On the other hand, if air drying is your option, coat the ends of the blank with wax or any commercial end sealer that will slow down its drying rate, hence reducing the chances of cracking. Put it in a cool, dry place with enough air circulation. This may take weeks or even months, depending on where you live and the type of wood used.
- Kiln Drying: Some turners employ a dehumidification kiln for faster results. This kiln can dry much quicker while still allowing the control of the final moisture content.
These methods are useful in quickly preparing bowl blanks without ruining their suitability for turning due to instability caused by wetness.
Frequently Asked Questions (FAQs)
Q: How can I use a microwave oven to dry wood?
A: To dry wood in the microwave, select a lower power setting to avoid causing any damage. Place your piece of wood inside and run the microwave for short intervals, typically 2 minutes at a time. Remove the piece, let it cool, and then check for moisture. Repeat this process until the wood is dry.
Q: Is it safe to put wood in a microwave oven?
A: It is safe to put wood in the microwave if you take precautions, such as using lower power settings and monitoring the wood closely to prevent burning. Always let it cool between sessions to avoid overheating.
Q: How do I prevent the wood from burning in the microwave?
A: To prevent the wood from burning, use a lower power setting and run the microwave for shorter intervals, around 2 minutes. Let it cool between cycles to ensure the temperature doesn’t get too high. This will help safely remove the moisture from the wood without causing it to burn.
Q: Can I dry a roughed-out woodturning piece in the microwave?
A: You can dry a roughed-out woodturning piece in the microwave by following the same low-power, short-interval approach. Let the piece cool between each drying session to prevent damage.
Q: What types of wood are best for microwave drying?
A: Hardwoods and smaller pieces of wood are generally better suited for microwave drying. Larger pieces or timber with a lot of moisture may require more care and longer drying times.
Q: How long does it take to dry wood in the microwave?
A: The time it takes to dry wood in the microwave varies depending on its size and moisture content. Typically, it involves several cycles of 2 minutes each at a lower power setting, with cooling periods in between. The process can take a few minutes to a couple of hours.
Q: Can I defrost and dry wood simultaneously in the microwave?
A: Defrosting and drying wood simultaneously in the microwave can be tricky. It’s better to use the lower power setting and short intervals approach. If the wood is frozen, allow it to defrost naturally before commencing the drying process.
Q: What precautions should be taken when using a microwave to dry wood for turning?
A: When drying wood to turn in the microwave, always use lower power settings and monitor the wood closely. Let it cool between cycles, and check for any signs of overheating or burning. This ensures the wood remains in good condition for turning or carving.
Q: Why should I use a microwave for drying wood instead of traditional methods?
A: Using a microwave to dry wood can significantly speed up the process compared to traditional air-drying methods. It’s beneficial for smaller pieces or for quick projects, such as preparing wood for turning or making small crafts.
Q: How can I tell if the wood is completely dry after microwaving?
A: You can tell if the wood is dry by monitoring its weight; dry wood will be lighter. Another method is to check for uniform dryness throughout the piece. The wood should be dry if there is no condensation or moisture spots. Let it cool completely before handling it to get an accurate assessment.