


Preserving new meal tastes throughout the year is one of several reasons drying herbs is excellent. For those who garden a lot and those who buy them from stores, figuring out how to dry them correctly could be a game changer. This article will show you how to dry rosemary quickly using your microwave in only 90 seconds. We will also share other herb-drying techniques that can keep your kitchen well-supplied all the time. After reading this post, you will get hands-on tips and valuable insights about ensuring your herbs remain fresh and tasty throughout any cooking expedition.
What is the Best Way to Dry Fresh Rosemary?
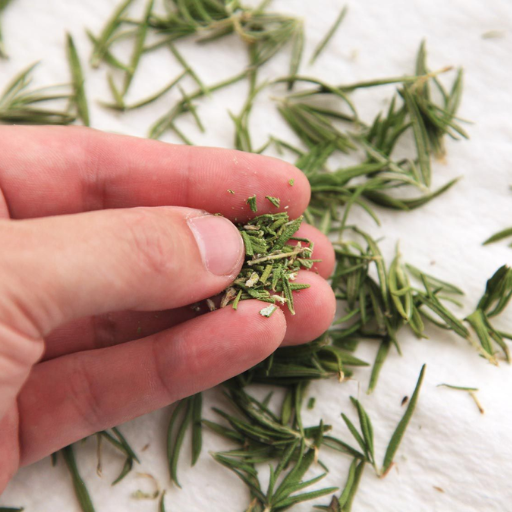
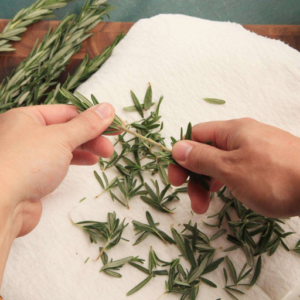
Image source: https://www.sustainablecooks.com/
When drying fresh rosemary in the microwave, the quickest and simplest way is hard to beat. First, rinse off rosemary sprigs with cold water and pat them dry using a paper towel. Next, place your sprig on a paper towel over a microwave-safe plate to help soak excess moisture. Cover it with another paper towel before putting it into the oven. Set your microwave power level high for 2 minutes, but do not forget to check every 30 seconds to avoid burning herbs. And when they turn crispy and brittle, allow some time for cooling before transferring them into an airtight container – now those flavors won’t go away quickly! This also keeps all flavoring properties intact, making it suitable for culinary purposes.
Why Choose a Microwave to Dry Herbs?
One would want to use a microwave instead of other methods when drying herbs for several reasons. One significant advantage is speed; unlike traditional air-drying, which can take days or weeks depending on weather conditions, microwaves allow users to dry small batches within minutes, thus saving time significantly. Secondly, this machine preserves natural oils found within plants due to its controlled environment, hence preventing their loss while at the same time maintaining flavors intact such that they still possess fragrance even after years pass by since being dried using such an appliance. Finally, among all techniques available for quick preservation without sacrificing quality, none beats the convenience factor associated with the minimum requirement in terms of labor input plus ease during the clean-up stage, hence making it the most suitable choice if anyone wants a fast, keep-safe, fresh herb supply without compromising their taste.
Using a Dehydrator to Dry Fresh Rosemary
Using a dehydrator to dry fresh rosemary is easy and very efficient. You start by washing the rosemary, then dry it with a paper towel. Trim the stems to fit on your dehydrator trays comfortably. Put the rosemary sprigs on the trays, ensuring they are in one layer without overlapping. To gently remove moisture from the herbs within 6 to 12 hours, let them be dried at low heat of between 95°F and 115°F in a dehydrator. Check on it occasionally until it becomes brittle and crumbly when touched, which means it is ready for storage. Allow dried rosemary to cool entirely before storing it in an airtight container where its flavor can stay for a month or so. This method retains the oils and flavor of herbs, which means that any newly harvested ones will not lose their taste.
Pros and Cons of Air Drying
Pros:
- Affordability – Air-drying requires little investment since no special tools or energy are needed.
- Retains Nutrients – Gentle method that preserves essential oils, taste, and nutritional values in different herbs.
- Simplicity: Straightforwardness makes this an ideal choice even for beginners who may not have time to keep checking now and then
Cons:
- Takes Time: It could take days or weeks depending on humidity levels; hence, it may not work if you need quick results
- Unpredictable Environment: Mold can grow due to high moisture content caused by weather fluctuations during air drying.
-
Space Demand: Ample room is needed when spreading out these plants correctly; however, limited space could hinder people with only small areas available for drying purposes.
How do you dry rosemary in the microwave properly?

Putting rosemary in the microwave is a fast and easy way to dry it out. To begin, rinse off the sprigs under cold water and then blot them with a paper towel until they are dry. After that, place the sprigs between two sheets of paper towel and set them on a plate that is safe to use in the microwave. Microwave the rosemary on high for 1 or 2 minutes, checking every 30 seconds to avoid burning it. Once it is brittle and crumbles quickly, remove it from the microwave and let it cool down completely. Keep dried rosemary in an airtight container to retain its flavor and scent. This technique is ideal for people who want to dry things without special equipment quickly.
Preparing Fresh Rosemary
Wash off the sprigs under cool running water when preparing fresh rosemary to remove dirt or pesticides. Then, dry the rosemary with a paper towel before stripping the leaves off the stem. To do this, hold onto one end of the spring with one hand while using your other hand to pull down along the stem – this will cause all of its leaves to come loose. Depending on what you are making, fresh rosemary can be used whole, chopped up finely, or minced into tiny pieces with scissors or a knife. It’s great for flavoring meats like lamb or chicken; potatoes such as roasted ones; breads such as focaccia bread; oils like olive oil infused with herbs de Provence; vinegar such as balsamic reduction sauce – you name it! For maximum taste impact, add freshly picked rosemary at the beginning stages of cooking so that its oils have plenty of time to permeate throughout the dish.
Steps to Dry Your Herbs in the Microwave
- Wash and Wipe: First, rinse the fresh herbs thoroughly with cold water to remove any soil, then dry them using a kitchen paper towel.
- Put on Kitchen Paper Towels: Flatly spread the herbs on two kitchen paper towels. Put the paper towels and herbs onto a microwave-safe plate.
- Heat in Short Periods: Adjust the microwave’s heat setting to high; light in 30-second periods should be used for heating the herbs. Make sure that you check after each period that they do not scorch. Generally, this takes one to three minutes, depending on the herb and how much moisture it has.
- Test for Dryness: You will know if the plants are dry when they become fragile and can easily break apart between your fingers.
- Cool off, then Pack: Allow the dried plants to cool completely before transferring them into an air-tight container, which will help maintain their flavor longer.
This technique allows you to dry grasses fast without needing special tools, which is suitable for most home cooks.
Common Mistakes to Avoid
- Microwave overcrowding: a common mistake is putting too many herbs in the microwave simultaneously. This can prevent the herbs from drying evenly and increase the chances of them getting burnt. Consistently distribute them in a single layer.
- High heat for too long: Using high heat for an extended period may scorch the herbs, resulting in a loss of taste and nutrients. Use 30-second intervals and check often.
-
Failure to pat dry: Skipping this step leads to steaming rather than drying in the microwave after rinsing. Excess moisture may cause uneven drying, resulting in mold growth during storage. Ensure you have patted your herbs dry to enable an efficient drying process.
What Herbs Can You Dry in the Microwave?
The microwave can effectively dry several common herbs, like basil, parsley, thyme, oregano, mint, and sage. These low-moisture plants can be dried quickly without losing flavor or nutritional value. It might take a little bit longer to dry one herb than another, so it is essential to adjust for each specific kind. Always ensure single-layer drying until completely dry to avoid mold growth during storage.
Drying Fresh Herbs Like Basil and Thyme
Both basil and thyme are ideal for microwave drying because they contain less moisture.
Basil: Rinse off the basil leaves and pat them dry. Put a paper towel on the microwave-safe plate and place the leaves in one layer. Cover with another paper towel before turning on your microwave at a low power setting for 30 seconds. Check every 30 seconds until you get crispy leaves that are no longer pliable, which usually takes about 1-3 minutes.
Thyme: Wash and dry the thyme sprigs similarly as mentioned above for basil but with shorter intervals between checks since its smaller leaves tend to dry faster – around 1-2 minutes.
These plants must be thoroughly dried before storing; otherwise, they may grow mold, ruining their taste.
Herbs Best Suited for Microwave Drying
Microwave drying works best with herbs that have less moisture and more robust leaves. Rosemary, oregano, sage, and mint are some of the most suitable plants for this method, as they lose water quickly and keep their taste. Having needle-like leaves, rosemary dries in the microwave more rapidly, usually during 30-second intervals for about 1-2 minutes. Oregano, along with sage, which both have robustness and smaller leaves, also dry within a similar time frame while frequently taking around a minute or two to dry each herb completely at 30-second intervals. Therefore, being an aromatic herb with sturdy leaves, mint is another good candidate, often taking between one or two minutes to dry enough to be appropriately stored without losing flavor or aroma. The drying process should be monitored closely because over-drying will burn them, but under-drying may cause mold while storing, if not all parts of every single dried herb are entirely dried out, thus losing their strength.
Extending the Process to Other Herbs: Oregano, Sage, Parsley
Oregano: Clean and dry oregano sprigs. Layer them between two paper towels. Microwave on low for 30 seconds each until done. Oregano dries fast (1-2 minutes). The leaves must be brittle and powdery when touched.
Sage: Rinse the sage leaves and make sure they are dry. Lay them flat between two paper towels so there is only a single layer of leaves. Microwave them at a lower setting than the usual power level. Check every 30 seconds on average until they are all dried out—it should usually take 1-3 minutes. Sage has enough foliage to be dried well using this method without losing much taste intensity.
Parsley: Once you have washed off any dirt from the parsley’s surface, make sure to pat it dry with a clean cloth or paper towel, then proceed by placing them in a single layer over some more paper towels again, but this time inside the microwave oven itself. Use a lower wattage setting if your microwave has multiple power levels; otherwise, use the lowest power level available throughout the microwaving process, which should still work fine anyway since parsley is a very delicate leafy herb prone to drying even faster than other herbs such as oregano or sage mentioned earlier thus cautioning us against too much heat exposure. So now we will need to microwave these for about thirty seconds at a time while checking frequently.
Following the above procedure ensures that oregano, sage, and parsley stay fresh for longer periods while maintaining their original flavor. Different people prefer various meals with specific tastes.
How Do You Store Dried Herbs?
To effectively store dried herbs, put them in containers that do not let air in, such as glass jars or resealable plastics, and keep the containers far from direct sunlight or heat. Remember to indicate the herb’s name on each container and when it was dried to ensure freshness. Store these containers somewhere cool and dark, like a pantry or cupboard; well-dried herbs can remain potent for about twelve months if stored correctly.
Choosing the Right Airtight Container or Jar
When choosing an air-tight container for storing dry herbs, consider these essential aspects to maintain its freshness and flavors:
- Substance: Since they don’t absorb smells or flavors due to being non-porous, it is advisable to use glass jars. Mason jars can also work, but people prefer high-quality plastic ones, which should be food-safe and tightly sealed.
- Sealing: Containers with lids that fit very tightly, such as screw-top jars or those with snap-locking lids, are what you need because they ensure no air enters into the container, hence keeping moisture out too, which would otherwise make herbs lose their strength and grow moldy.
- Capacity: It’s better if your storage vessel is almost equal to the number of dried plants so as not to leave much room for air inside, which may cause oxidation, leading to loss of taste buds recognized pretty fast.
- Protection against Light: Although transparent glasses are popular choices, amber-colored bottles or anything made from dark material will shield against degradation by light over time, whereas clear ones should just be kept away from any place where there’s light.
If you follow these tips, they’ll still be tasty enough even after many years without using them.
Labeling and Organizing Your Dried Herbs
Proper labeling and organization are necessary to ensure your dried herbs are easily identified and used. Here are a few tips on how to effectively manage your herb collection:
- Labeling: Label each container with the herb’s name and the dried date. Waterproof labels and a permanent marker will help keep them readable over time; including the dates will help you remember which ones are fresher or more potent.
- Organizing: Categorize your herbs by culinary, medicinal, or aromatic – this way, you can locate what you need faster. If space permits, alphabetize them for quick reference (especially if there are many).
- Storage: Keep them in cool, dark places like pantries or cupboards to preserve their quality. Containers should be kept away from heat sources and direct sunlight, which can degrade their effectiveness & flavor.
Implementing these simple yet effective methods of identification and arrangement guarantees that dried herbs will always remain at their best for cooking or healing purposes.
Optimal Storage Conditions for Longevity
To lengthen the shelf life of dried herbs and keep them in good condition, it is necessary to store them properly. Here are some essential things to consider:
- Heat: Keep dried herbs at room temperature below seventy degrees Fahrenheit or twenty-one degrees Celsius. If the temperature is raised too much, they may lose their strength and flavor faster.
- Light: Light exposure can break down the essential oils and other compounds found in herbs, making them less potent. Therefore, use opaque or transparent containers in dark areas, such as pantries or cupboards.
- Moisture: Low humidity must be maintained to prevent the growth of molds and mildew. Hermetic seals are indispensable to shut out dampness at all costs. You may also want to try using packs with silica gel, which will absorb even more moisture inside these containers.
If you follow this advice on storing dried herbs—keeping them cool, shielding them from light, and ensuring dryness—you can expect their extended freshness for cooking and healing.
Why Should You Wash the Herbs Before Drying?

It is essential to wash the herbs before drying to remove any soil, insect, or pesticide on the leaves. This stage ensures that the herbs are clean and safe after drying. Washing can also play a role in preventing contamination and preserving the quality and purity of these plants. When you wash them correctly and dry them thoroughly, it significantly reduces the chances of mold forming during drying, which ensures hygiene at the last product, which is also high in value.
Importance of Removing Dirt and Pesticides
There are many reasons why removing dirt and pesticides from herbs before they are dried is crucial. First, consuming residual herbicides can cause various health problems, such as toxicity or allergic reactions. Secondly, bacteria thrive best in dirty environments, with dirt acting as their breeding ground; failing to clean appropriately could expose one to food poisoning through infected plants. Thirdly, if particles get into flavorsome substances, undesirable tastes will be produced, thus affecting culinary and medicinal experiences negatively, while using cleaner ones leads to more enjoyable moments. Fourthly, It is necessary to ensure safety and efficiency when used.
Proper Washing Techniques for Fresh Herbs
To wash fresh herbs effectively, do as follows:
- Pour Cold Water: First, pour a lot of cold water on the herbs. You may want to rub the leaves softly with your fingers until all visible dirt or other objects are removed.
- Salad Spinner: Then, use a salad spinner after rinsing. Spinning in the device helps remove excess water, enabling it to dry quickly and not become soggy.
- Optional Vinegar Solution: For more sterilization, soak them in a vinegar solution (1 part vinegar mixed with three parts water) for a few minutes. This will kill any remaining germs or pests.
- Paper Towels Drying Or Clean Cloth Wiping: Afterwards, lay these plants on paper towels or clean cloth, then pat them gently until they get dried completely. Alternatively, one can air-dry them wholly before continuing with the drying stage.
These washing methods guarantee your herbs are clean, safe, and ready for preservation.
Drying the Herbs Before Microwave Treatment
A critical step before microwaving is drying the herbs uniformly to preserve them well. To do this, spread them out in one layer on a kitchen towel or paper towel, which has been washed, then air-dried for several hours until most of the surface moisture evaporates. This is necessary because it will help avoid steaming and cooking instead of drying when using a microwave oven to heat ingredients like spices, onions, etc. In addition, some sources suggest leaving the herb material in a dry place with good air circulation overnight, thus ensuring sufficient moisture removal before starting microwave treatment. Once they feel dry to the touch, proceed with the microwave drying.
What Are the Different Ways to Dry Herbs?
To dry herbs, you can use different ways:
- The first is air drying, which is the most common method. You should gather the stems in bunches, tie them with a string, and hang them upside down in a place with good ventilation but no direct sunlight.
- Another way is oven drying. What you need to do here is to spread out your herbs on a baking sheet and put it into an oven, which should be set at its lowest temperature possible; it might help if you keep the door slightly open so that any moisture produced can escape easily – just make sure not to over-dry them!
- Also, there is microwave drying – a speedy one! Take a microwave-safe plate or bowl and put some paper towels at the bottom. Place your herbs on top of these towels, then cover them with another paper towel (to prevent splattering). Set your machine on high for about 15 seconds; check and turn the herbs after each interval until they are scorched.
- If you have a food dehydrator, then you’re lucky! Set it at low temperature, spread your herbs onto trays, and let the device work until all stems become brittle.
-
Finally, we have freezing—though not precisely a ‘drying’ method, this one allows us to preserve herbs for much longer than other methods do… First, lay your clean leaves on a tray so that none of them touches the others; put this tray into the freezer for a few hours (or overnight) until all items are frozen solid; then transfer everything into a container or plastic bag for further storage.
Comparing Microwave Drying to Traditional Methods
Swift and convenient compared to the traditional methods of drying herbs is microwave drying. It can take weeks or days for herb leaves to dry when spread in the air, thus making this method time-consuming. This technique becomes very useful, especially if you need dried plants quickly or if there is limited space available. However, one should be careful not to over-dry or cook them because microwaving can also cause loss of taste and nutrients. On the other hand, air and oven methods like dehydration with air retain flavors better than any other way by preserving nutrition through slow, gentle processes that characterize it. Though almost free for charging fees while maintaining the natural appearance of leaves, ovens provide controlled environments. Still, they may need continuous checkups during the operation since it dries out faster than air itself does at times too quickly, even before monitoring is done regularly enough. Therefore, each has advantages and disadvantages depending on what you want to achieve from them and where resources are available.
Understanding the Drying Time Variations
The amount of time it takes for herbs to dry can vary greatly depending on the technique, herb type, and environmental conditions. Commonly, air drying takes one to two weeks to complete but may take longer in more humid environments. In contrast, drying in an oven usually takes a few hours at around 140°F (60°C), while microwave drying only requires a few minutes, although it should be supervised closely to avoid burning them. Different kinds of herbs also have different drying periods: thicker and woodier types like rosemary or oregano take much longer than tender ones such as basil or mint. Other things, such as how dense the bunches are, can affect this too, along with humidity levels outside and inside as well as air circulation, which all these external elements contribute significantly towards determining what is called “the total time required for drying.” Every procedure and variety will need adjustments if you want perfect dried herbs without compromising their taste buds!
Bundle, Dehydrate, or Air Dry: Which is Best?
If you can’t choose between bundling, dehydrating, or air drying your herbs, take into account the benefits and downsides of each. A cheap and easy way to do this is to bundle them up and let them hang in the air; it preserves flavors and nutrients optimally but may take as long as fourteen days. Dehydrating with a specific dehydrator offers relatively fast and uniform drying that usually takes a few hours, thus being suitable when drying large quantities at once. Still, it requires the purchase of equipment, which is expensive. Using screens or racks for drying herbs naturally has its merits, too, since it can be done efficiently without compromising quality; however, there should also be enough space with proper ventilation; otherwise, mold will grow. Ultimately, what works best depends on your resources, time, area available for use, and the amount needed to be dried.
Frequently Asked Questions (FAQs)
Q: What are the best herbs to dry in the microwave?
A: Rosemary, dill, cilantro, chives, and tarragon are the best herbs to dry in a microwave. This method dehydrates them fast, keeping most of their taste and color.
Q: How do I prepare fresh rosemary to dry in the microwave?
A: To dry fresh rosemary using a microwave, rinse sprigs under running water, then pat them gently with a paper towel. After that, strip leaves from stalks and lay them flat on parchment paper without overlapping each other.
Q: What is the process for drying herbs in the microwave?
A: Spread herb leaves in one layer on parchment paper. Place in microwave and heat on high for 20 seconds, checking after each interval. Continue microwaving until the herbs are completely dry and crumble easily.
Q: How do I know when the herbs are dehydrated?
A: When the leaves crumble easily between your fingers, you’ll know they’ve dried out. This usually takes about 90 seconds total (microwaving in 20-second bursts) but can vary depending on what kind of herb it is and how powerful your microwave happens to be.
Q: Can I use this method to dehydrate larger batches of herbs?
A: No-evenness of drying is key with any type of microwave herb-drying technique; therefore, it’s best done in smaller batches. For more significant amounts, either go through multiple rounds using this process or try different approaches, such as air drying or using a dehydrator instead.
Q: How should I store dried herbs after using a microwave to dry them?
A: Once dehydrated, store your herbs in an airtight container in a cool, dark place. This container can be a jar or any airtight container, which helps preserve their flavor and color for longer.
Q: What are the different ways to dry herbs besides using a microwave?
A: Besides using a microwave to dry herbs, other effective ways to preserve them include air drying by hanging them in bundles, using a food dehydrator, or drying them in an oven on low heat. Each method has its benefits regarding flavor retention and ease of use.
Q: Can I dry delicate herbs like cilantro in the microwave?
A: You can dry delicate herbs like cilantro in the microwave, but they require more attention. Use short increments like 10-15 seconds to avoid overheating and ensure they are spread in a single layer for even drying.
Q: Why is it essential to pat herbs dry before microwaving?
A: Patting herbs dry before microwaving is crucial to remove any surface moisture that can cause uneven drying and extend the drying time. It also helps preserve the herbs’ flavor and color during drying.