


Microwave flower pressing is a fast and straightforward way to preserve the beauty of flowers and keep fond memories alive. In this blog post, we will show you how to use a microwave to press flowers in ways that save time and help maintain your blooms’ vibrant colors and delicate shapes. You may want to create unique art pieces, decorate gifts, or just bring nature indoors – whatever it is, this DIY guide will give you the knowledge you need to turn seasonal flowers into lasting keepsakes. Let’s look at some tips and tricks that can help make your flower pressing fun and successful!
How to Press Flowers in the Microwave

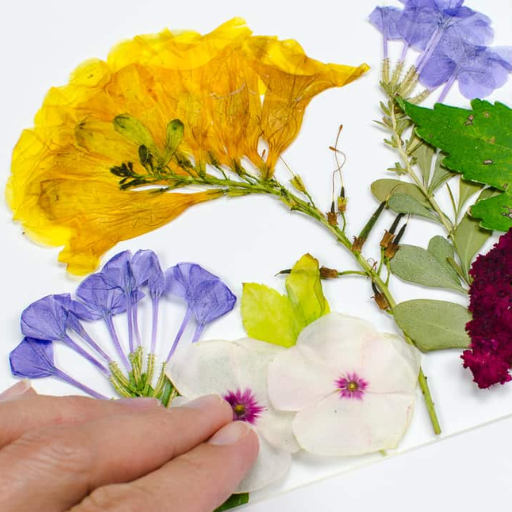
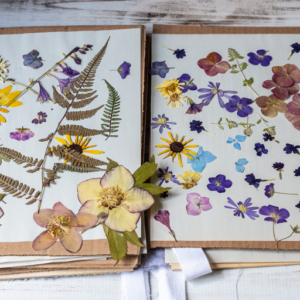
Image source: https://hymnsandverses.com/
To begin pressing flowers in the microwave, choose fresh blooms with bright colors free from blemishes. Cut off stems and remove any unwanted leaves before placing them between two pieces of absorbent paper, such as parchment paper or coffee filters. Position these papers along with the flowers between two plates safe for microwaving. Heat up on high power for 30 seconds at a time, checking dryness after each interval, which usually takes about 1-3 minutes, depending on the thickness/type of flower being used. Once dried, allow cooling down, then carefully remove pressed ones from their wrappings. Store flat in dry areas where they won’t be disturbed too much so that petals stay beautiful forever.
What You Need to Press Flowers
The equipment you will need to microwave flowers successfully are as follows:
- Fresh Flowers: For example, daisies, pansies, or violets that are bright and fresh without being too thick.
- Absorbent Paper: This can be parchment paper, coffee filters, or paper towels, which help soak moisture from the blooms.
- Microwave Safe Plates: One plate holds absorbent paper with the petals on it while another covers them during heating in a microwave.
- Scissors or garden shears: Trimming stems and removing excess foliage.
- Tweezers: They come in handy for picking up delicate pressed petals after completely drying out.
- Gloves (optional): Protect your hands and preserve flower integrity while handling.
Collecting these supplies will guarantee a smooth process when pressing flowers!
Step-by-Step Instructions to Press Flowers in the Microwave
- Prepare the Flowers: First, select fresh flowers, then cut stems down to the desired length. Remove any leaves that might interfere with pressing.
- Arrange the Flowers: Place absorbent paper on one of the microwave-safe plates. Place blossoms on top, ensuring they aren’t touching each other so air can circulate them for even drying. Cover with more absorbent paper, then put a second microwave-safe plate over it, like making a sandwich.
- Microwave the Flowers: Heat plates at high power for 30 seconds and check the dryness of blooms after this time has passed; if not dry yet, keep microwaving in 30-second intervals until completely dehydrated, which generally takes between 1-3 minutes, depending upon the type/size of flower used.
- Cool and Remove: Afterward, carefully remove the top dish, allowing the petals to cool off for a few minutes before using tweezers. Lift them gently off the absorbent material where pressed; otherwise, damage may occur.
-
Store Your Pressed Flowers: To keep your petals flat until you’re ready to use them in craft projects, place dried flowers inside a dry and flat scrapbook or protective storage box.
Tips for Pressing Flowers without a Flower Press
- Press Flowers with Heavy Books: This method is as simple as it gets—put flowers between the pages of heavy books. They need to be laid flat, and you can add more weight on top of them if you want to apply pressure. This process might take a few weeks, but it works great for many different types of flowers.
- Cardboard and Paper Towels: Place one flower specimen between two pieces of absorbent paper towel, then put that inside sheets of cardboard. Make sure to bind the cardboard tightly with rubber bands or string, so it applies enough pressure. Check on the flowers every once in a while just in case they aren’t drying out evenly
- Ironing Method: Place your flower between two sheets of paper and use an iron set at low heat over the top. Move the iron back and forth gently for a minute or two, but don’t let it get too hot—that will scorch the petals! This technique gives faster results—usually within minutes.
If you’re looking to craft beautifully preserved flowers but don’t have access to a traditional flower press, these alternative techniques can help.
Can You Press Flowers without a Flower Press?

You can indeed press flowers without using a conventional flower presser; several alternative methods work equally well, including the heavy books method, where you use any kind of book that is very thick, like a dictionary, among others, or if not this cardboard coupled together alongside towels made from fabric may also serve the purpose effectively thus giving good outcome after applying some sort weight upon them ensuring appropriate drying takes place resulting into nice looking pressed blossoms ideal for various handy works – all such artsy endeavors deserve beauty though right.
Alternative Materials to Use
Various materials can be used to improve your results when pressing flowers without a traditional flower press. Here are some commonly recommended alternatives:
- Baking Paper or Parchment Paper: These types prevent the flowers from sticking to other materials and allow moisture to escape. Before putting pressure on them, place the flowers between two sheets of baking paper.
- Newspaper: This is the most accessible option for those looking for a fast and easy method. Place the flowers between layers of newspaper, drawing out moisture and aiding their drying process.
- Old Phone Books or Magazines: Heavy publications such as these work well as makeshift presses, just like heavy books, because they are thick enough to provide adequate weight while allowing air to flow around the flowers.
- Waxes and Gels: Some crafters prefer using wax paper or gelatin sheets to encapsulate flowers to keep their color and shape for later simple crafting.
Combining these materials with previously mentioned pressing techniques allows you to create beautiful preserved blooms that are perfect for your craft projects!
Pressing Flowers with Heavy Books
Using heavy books is an easy yet efficient way for flower preservation; you can press them down into pages within a book over time until they dry (usually about 1-2 weeks). To start, pick fresh, unblemished blossoms, then cut their stems down roughly two inches long before laying them flat between two pieces of parchment/wax paper, which protect during this process. The prepared petals should be placed between non-crowded pages for even weight distribution/air circulation during drying within a heavy book afterward. After waiting one week (or more, depending on how moist they were), gently remove pressed blooms from its pages where they will have become lovely flattened specimens suitable enough for many different types of crafts, decorations, keepsakes, etc. To maintain quality, store dried flowers somewhere dry after use so that it lasts longer.
How to Dry Flowers in the Microwave: Different Techniques
Microwave flower drying is a fast and efficient way to preserve them. The most common method uses silica gel, a great moisture absorber. First, pour some silica gel into the bottom of a microwave-safe container. Next, place your flowers on the top, ensure they don’t touch each other and then cover completely with more gel. Heat for about 30 seconds to one minute in the microwave until dry.
Another method involves paper towels. To do this, place two layers of paper towels on top of each other in a dish that can go in the microwave with your flowers between them and heat on low for one or two minutes, checking every thirty seconds. Although it may not produce as well-defined shapes, this method can retain more color than others. After cooling off after being heated up, store these beautiful creations somewhere airtight so they stay pretty forever.
The Microwave Method
Microwaves are one of the fastest ways to dry flowers while maintaining their color and shape. Several trusted sources say you should start by taking fresh, brightly colored blooms and removing any unnecessary foliage around them first before doing anything else. If you want great results when using silica gel as your drying agent – just take some microwave-safe container such as Tupperware or something similar, fill it up evenly all over its inner bottom surface area with said crystals, then arrange open petals facing upwards, single layer deep only on top followed by closing the lid tightly again sealing moisture inside completely until next time opening again gets done later due process completes itself fully transferring dried flower heads from within sealed jars afterwards back outdoors where sunshine always shines bright enough even during cloudy days.
Using Silica Gel for Drying Flowers
Since it is said that silica gel enables the process of flower drying while preserving their color and shape, many people use this method to dry flowers. The first step is selecting fresh flowers and cutting their stems. After pouring a layer of silica gel into a container, face the flowers face up and cover them completely with more silica gel. To achieve the best results, you should always use an airtight container with minimum exposure to moisture. Depending on flower type and size, leave the flowers there for approximately two to seven days. When that time has passed, carefully remove the flower(s), brushing off excess silica as you go along. Delicate blossoms love this method because it keeps their beauty intact, giving them an everlasting dry form.
Creating Pressed Flower Art: Ideas and Projects
Showcasing dried flourers’ charm through pressed art is an attractive way of adding a personal touch to your home decor. Below are some innovative project ideas:
- Framed Art: Arrange pressed flowers under glass within a frame for unique wall art that brings nature indoors.
- Bookmarks: Create bookmarks using sturdy card stock by gluing one side with pressed flowers, making them delightful, functional keepsakes.
- Greeting Cards: Craft homemade cards decorated with pressed flowers, which are ideal for special occasions or heartfelt messages.
- Coasters: Create beautiful coasters by combining functionality and elegance using resin to encapsulate pressed flowers.
- Jewelry: Set tiny resin pendants around tiny pieces of jewelry made from natural-inspired materials like earcuffs and engraved shells. Tiny florescent plants will ensure that wearers show off their love for Mother Nature every day.
All these projects are meant to celebrate floral beauty and allow self-expression through artistic work done at home.
Making Gift Tags with Pressed Flowers
It’s a lovely way to personalize gifts by making tags with pressed flowers. Cutting out tags from sturdy card stock should be the first step, ensuring they are the right size for your gifts. Next, choose some of your favorite pressed flowers and arrange them carefully on the tags, playing around with different designs until you settle on one that looks good. Use a strong adhesive like glue or double-sided tape to hold down the flowers. To protect and make it last longer, think about using a clear sealant over the top of the tags or laminating them. Finally, punch a hole at the top and add some ribbon or twine for decoration. These beautiful little things dress up your gifts and bring a bit of nature that will surely delight whoever gets them.
Creating Wall Art with Your Microwave Pressed Flowers
Choose a clean canvas and frame to display stunning wall art from microwave-pressed flowers. Ensure that they are bright in color while well-preserved before arranging them artistically on this surface; try out various patterns until it is pleasing enough for you, then use craft glue suitable for such mediums when securing each piece in place afterward cover with transparent acrylic spray if desired to give professional touch otherwise glass frames work just fine too since they protect beauty while enhancing longevity at home thereby making a personal statement through decor more artistic besides showcasing nature’s splendor all over again.
Designing Memory Frames with Pressed Flowers
Choose a frame that fits your decor to create beautiful memory frames with pressed flowers. Choose flowers that are special to you and remind you of happy times. Make sure they’re properly dried and pressed. Without the glass, arrange the flowers in the frame as you would like them displayed for others to see and remember. After laying out all the flowers in a way you like, glue them down lightly using some craft glue. To ensure nothing happens to your work of art and looks even prettier, consider putting a thin piece of clear acrylic or glass over the top, which will keep the blooms safe while making them more attractive! You can add something personal, such as a small note or photo next to the flowers, so this memory frame becomes an individualized keepsake filled with feelings.
Tips for Perfectly Pressed Flowers: Avoiding Common Mistakes
When pressing flowers, avoid mistakes so they turn out well. First, pick what type of flower; use thinner petals that dry nicely, such as pansies or daisies, instead of thick ones like roses. Properly prepare by cutting stems and getting rid of excess moisture because wetness causes molds when pressing flowers together between two pieces of paper inside heavy books – use anything else heavy enough if necessary – just don’t forget about it because otherwise some parts won’t get crushed evenly which means drying won’t happen uniformly either way around here my friend! Also, wait patiently since vibrant colors come only after weeks spent under pressure from above on top layers below themselves too tightly packed together without any room left over anywhere else at all besides maybe where air could flow freely through tiny holes created during initial stages when everything was still fresh before being put away into dark places where no one ever goes unless necessary (like school). Always handle dried petals gently, though, because otherwise, beauty might be lost forevermore.
Choosing the Right Flowers to Press
When choosing flowers for pressing, you need to consider the petals’ type and state. The flower should have a flat shape and thin petals like pansies, violets, and daisies because they flatten quickly while retaining color. Flowers with thick or waxy petals do not press well and may cause disappointment in the end product. These include roses and marigolds, among others. You should only pick fresh flowers that are neither wilting nor damaged to guarantee good looks after drying them out completely before you can start your project. Additionally, seasonal blooms usually give off vibrant colors, so make sure you get hold of what is blossoming at that time.
Ensuring Your Flowers Are Completely Dry
Some important steps must be taken to ensure your flowers are dehydrated before pressing them down into paper or any other material used for preservation. First, wash these dirty little things gently using cool water until no more insects remain on their surface, then pat them dry with a soft cloth-like towel afterward. Allowing airflow helps remove moisture from petals, which can lead to mold during pressing. Thus, it should take place in well-ventilated places overnight (or even longer) where temperatures won’t drop too low outside since it’s winter season right now, but spring will come soon enough. Also, silica gel is another effective method; placing the flowers in a container with silica gel can quickly absorb moisture while preserving their shape and color. Finally, touch test by feeling if dampness is left anywhere around those beautiful blossoms – only proceed when everything feels perfectly fine again! This way, we can produce beautifully preserved flowers without worrying about later deterioration.
Preserving the Color of Your Pressed Flowers
You can preserve the bright colors of your pressed flowers in several ways. One of these is to use a microwave for drying as it can quickly remove moisture while locking in color. To do this, place the flowers between two pieces of absorbent paper and microwave them for short intervals until they’re dry. Another method involves using glycerin mixed with water to keep blooms fresh longer and make their shades more vibrant. After pressing, try storing your flowers in a cool, dark place like an attic or basement away from sunlight so they don’t lose their color over time; alternatively, use acid-free paper when pressing them, which will help maintain pigment integrity, too! With these strategies employed, though, brightly colored everlasting pressed flowers will surely capture nature’s beauty.
Frequently Asked Questions (FAQs)
Q: What is the best method of pressing flowers in the microwave?
A: The best method of pressing flowers in the microwave involves placing the blooms between two paper towels and then microwaving them in 30-second intervals until the flowers are dry. This is a quick and efficient way to preserve flowers and greenery.
Q: What materials do I need to press flowers in the microwave?
A: You will need freshly picked flowers or greenery, paper towels, a microwave-safe plate, and a heavy book or tile to press well. Ensure the flowers are dry before starting the pressing process.
Q: How long should I microwave the flowers?
A: Microwave the flowers for 30-second intervals, checking them after each interval. Typically, flowers are dry and ready after 1-3 minutes total, depending on the type and thickness of the petals.
Q: Can I press any type of flower using this method?
A: Most flowers can be pressed in the microwave, but some varieties with thick petals or heavy blooms may require longer intervals. Thin, delicate flowers like daisies or white flowers work best. Experiment with different types to find your favorite pressed flowers.
Q: How do I ensure the flowers retain their color?
A: To retain the color of your flowers, avoid over-microwaving and place them on top of a white paper towel. Using less heat helps preserve the vibrant hues of the blooms.
Q: What is the best way to preserve flowers from a special bouquet?
A: Choose the freshest, most vibrant blooms and greenery to preserve flowers from a unique bouquet. Dry flowers in the microwave for 30 seconds until they are perfectly pressed. You can then use them to make keepsakes or art projects.
Q: How do I arrange the flowers for pressing?
A: Place your flowers between two pieces of paper towel and arrange them so they do not overlap. Put a microwave-safe plate on the flowers to create pressure and ensure an even press. This will help make pressed flowers that are flat and well-preserved.
Q: Can I use the microwave pressing method for greenery?
A: Yes, you can press greenery using the microwave method. Follow the same steps as with flowers. Greenery presses well and can add beautiful texture to your pressed flower creations.
Q: How do I use the pressed flowers for crafting?
A: Once your flowers are pressed and dry, you can use them for various crafts. Glue the back of each flower to create bookmarks, cards, or framed artwork. Make sure to handle them gently to avoid damaging the delicate petals.